Launch a new Managed GPU Cluster
Note: The following prerequisites are required to perform this operation:
- The Metal Cloud (Bare Metal HPC) quota must meet the required number of clusters. At minimum, you need:
- 1 BM server network
- 1 network for the load balancer
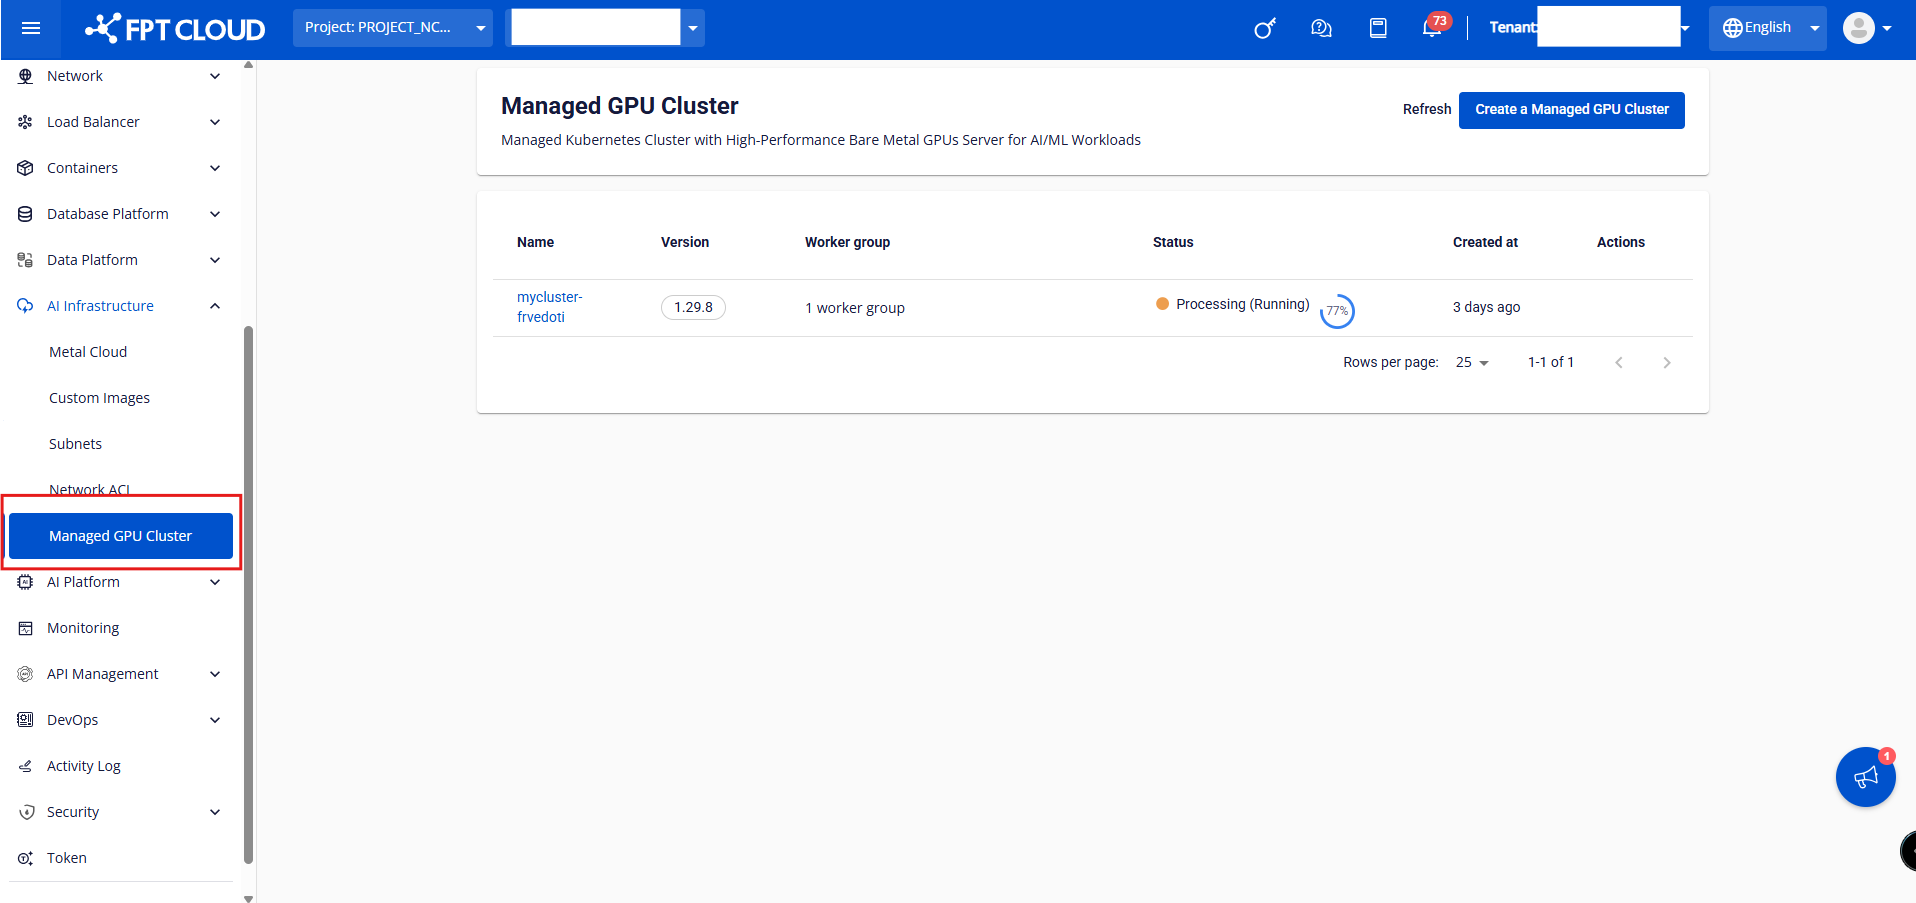
Step 1: In the FPT Portal menu, select [AI Infrastructure] > [Managed GPU Cluster] > "Create Managed GPU Cluster".
Step 2: Enter information in the cluster's [General Information] tab, then click [Next].
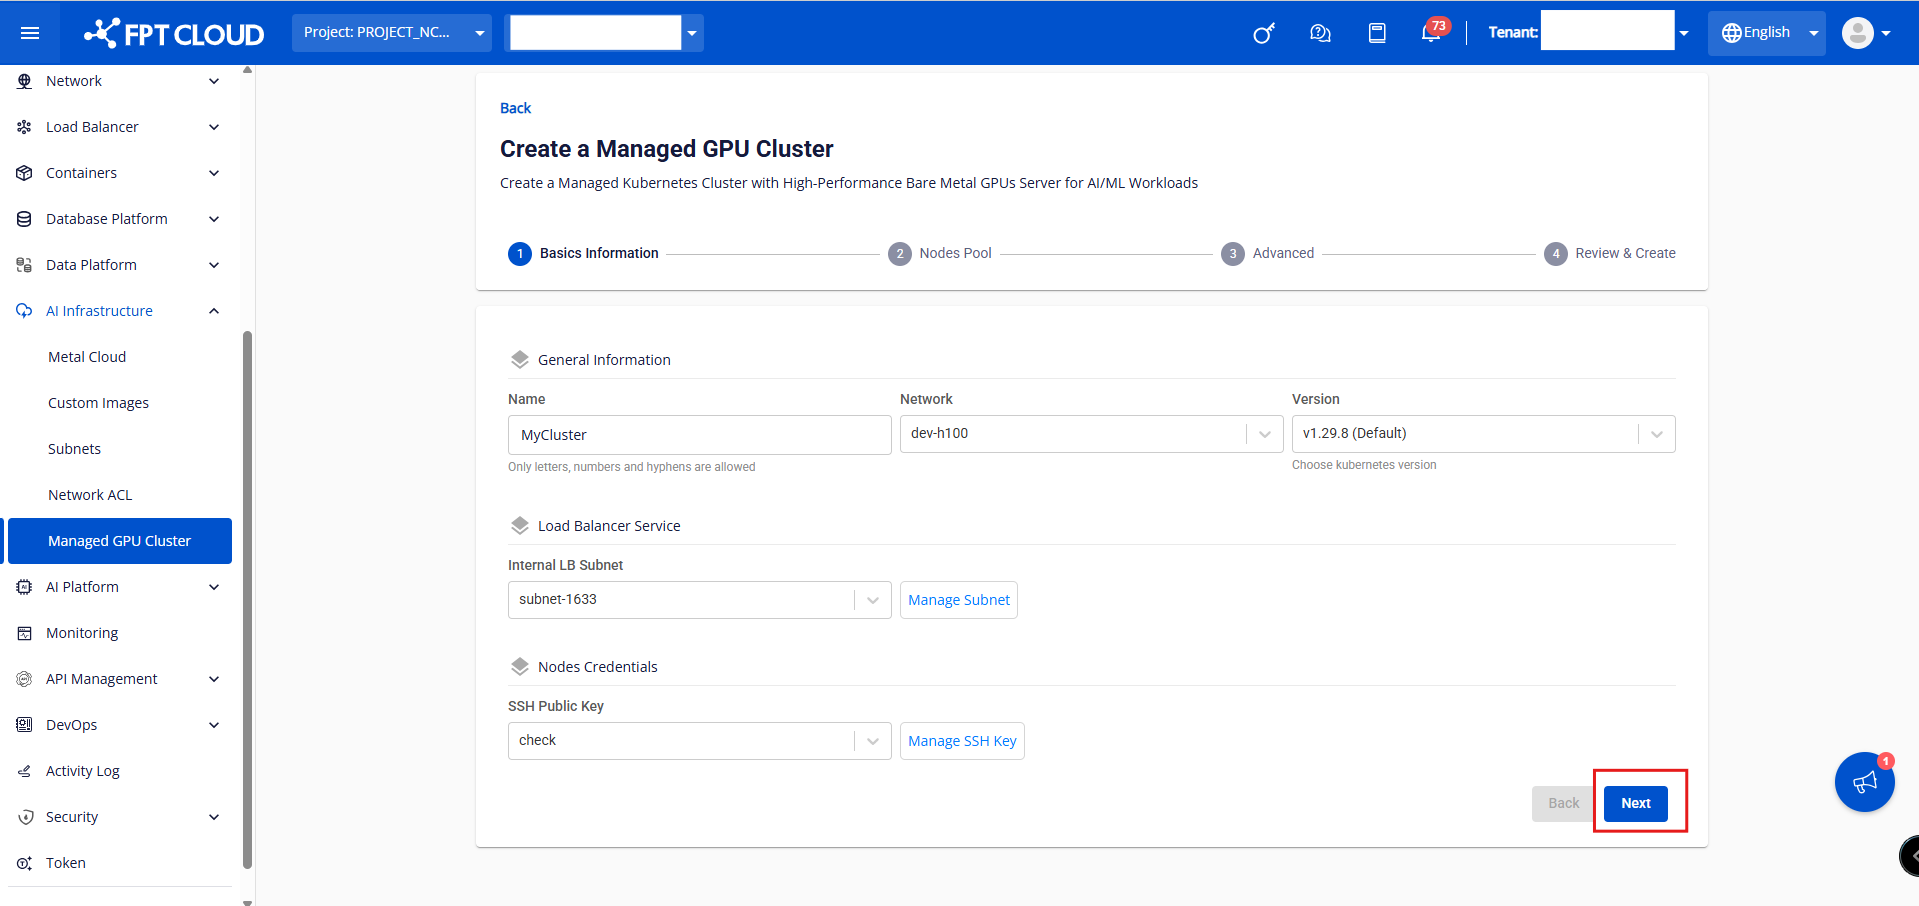
- General information:
- Name: Enter the cluster name. The cluster name must be unique and follow naming rules.
- Network: Select from the subnet range created for the Bare Metal GPU server.
- Version: Select the Kubernetes version appropriate for your application.
- Internal LB Subnet: Set the private IP range for load balancer-type services.
- SSH Public Key: The SSH key used to connect to the cluster's worker nodes via SSH.
Step 3: Enter information in the cluster's [Nodes Pool] tab, then click [Next]. Notes when creating a Managed GPU Cluster:
- Managed GPU Cluster manages worker nodes through worker groups — groups of worker nodes with the same configuration. You can divide worker groups for appropriate applications. The system requires at least 1 worker group (base), and you cannot delete this worker group.
- In the worker group settings section, you can assign labels to the desired worker group. These labels are applied to all worker nodes in the worker group. You can add or remove labels, and edit the key/value of existing labels. These labels allow you to easily deploy applications to different worker groups according to your needs.
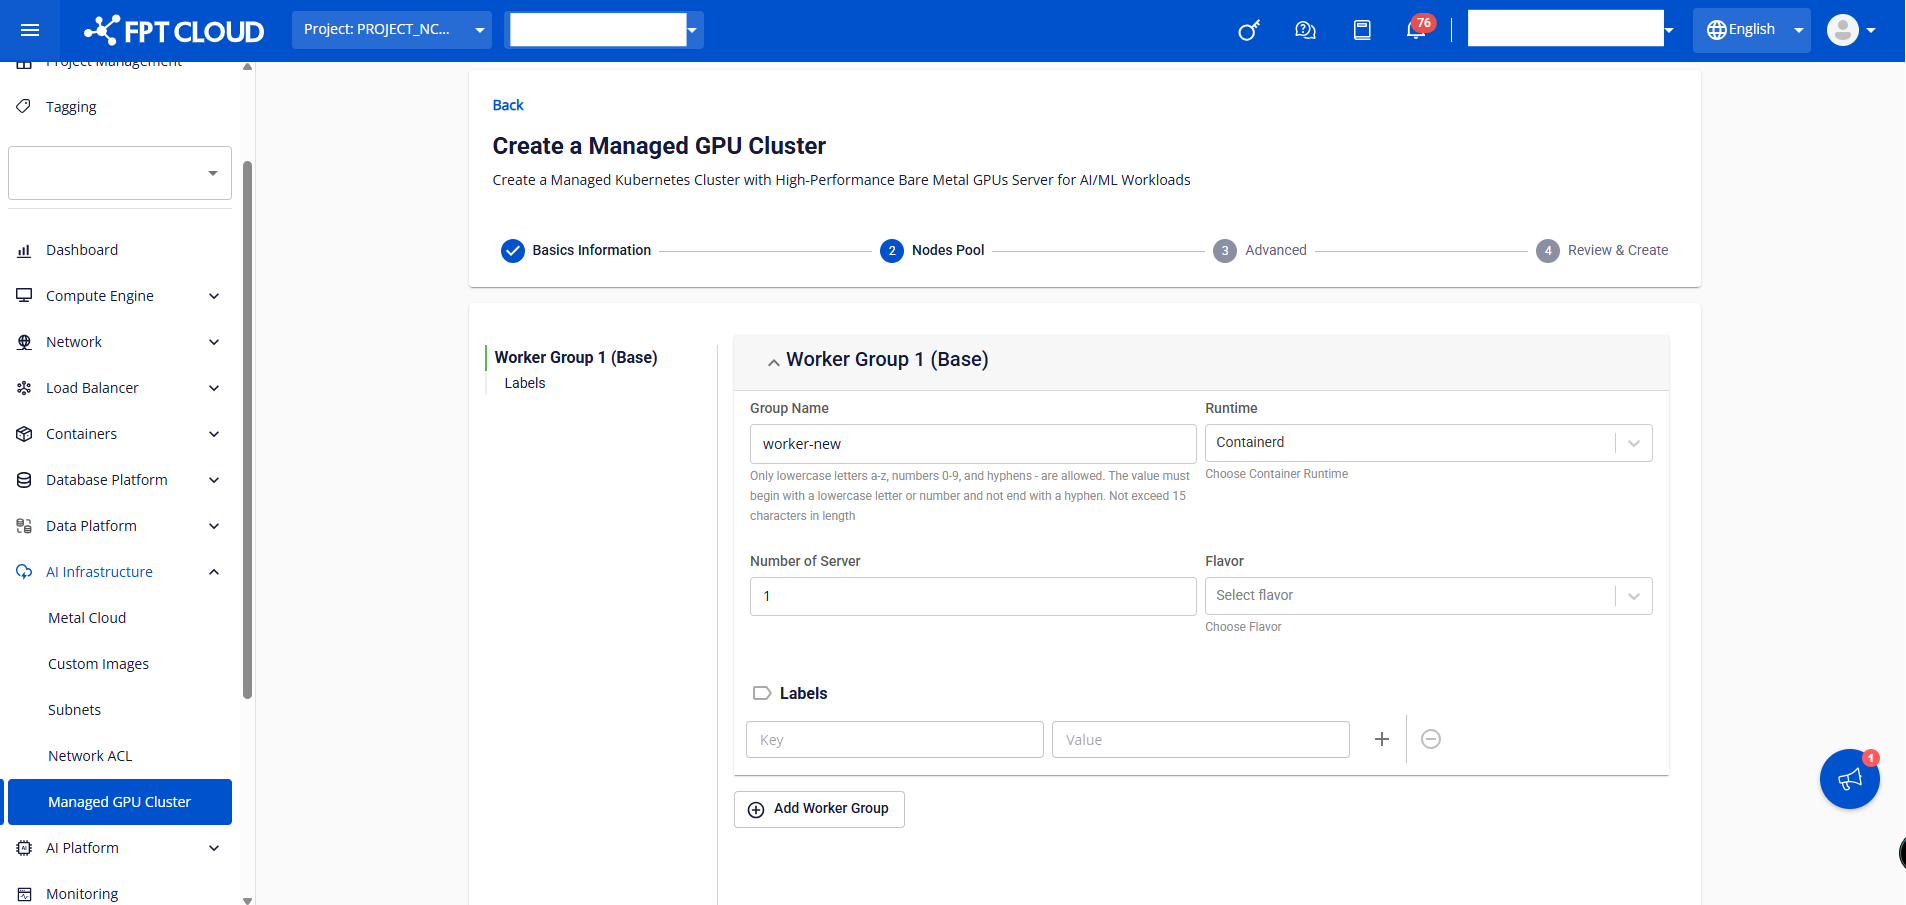
Worker Group 1 (Base):
- Group Name: Name the worker group to distinguish it from others.
- Runtime: Select the container runtime. Currently, the new system only supports the Containerd runtime container.
- Number of Servers: The number of MetalCloud Servers created to run workers in the cluster.
- Flavor: The flavor type of the Metal Cloud GPU server; default is H100.
- Labels: Assign Kubernetes labels to all workers in the worker group.
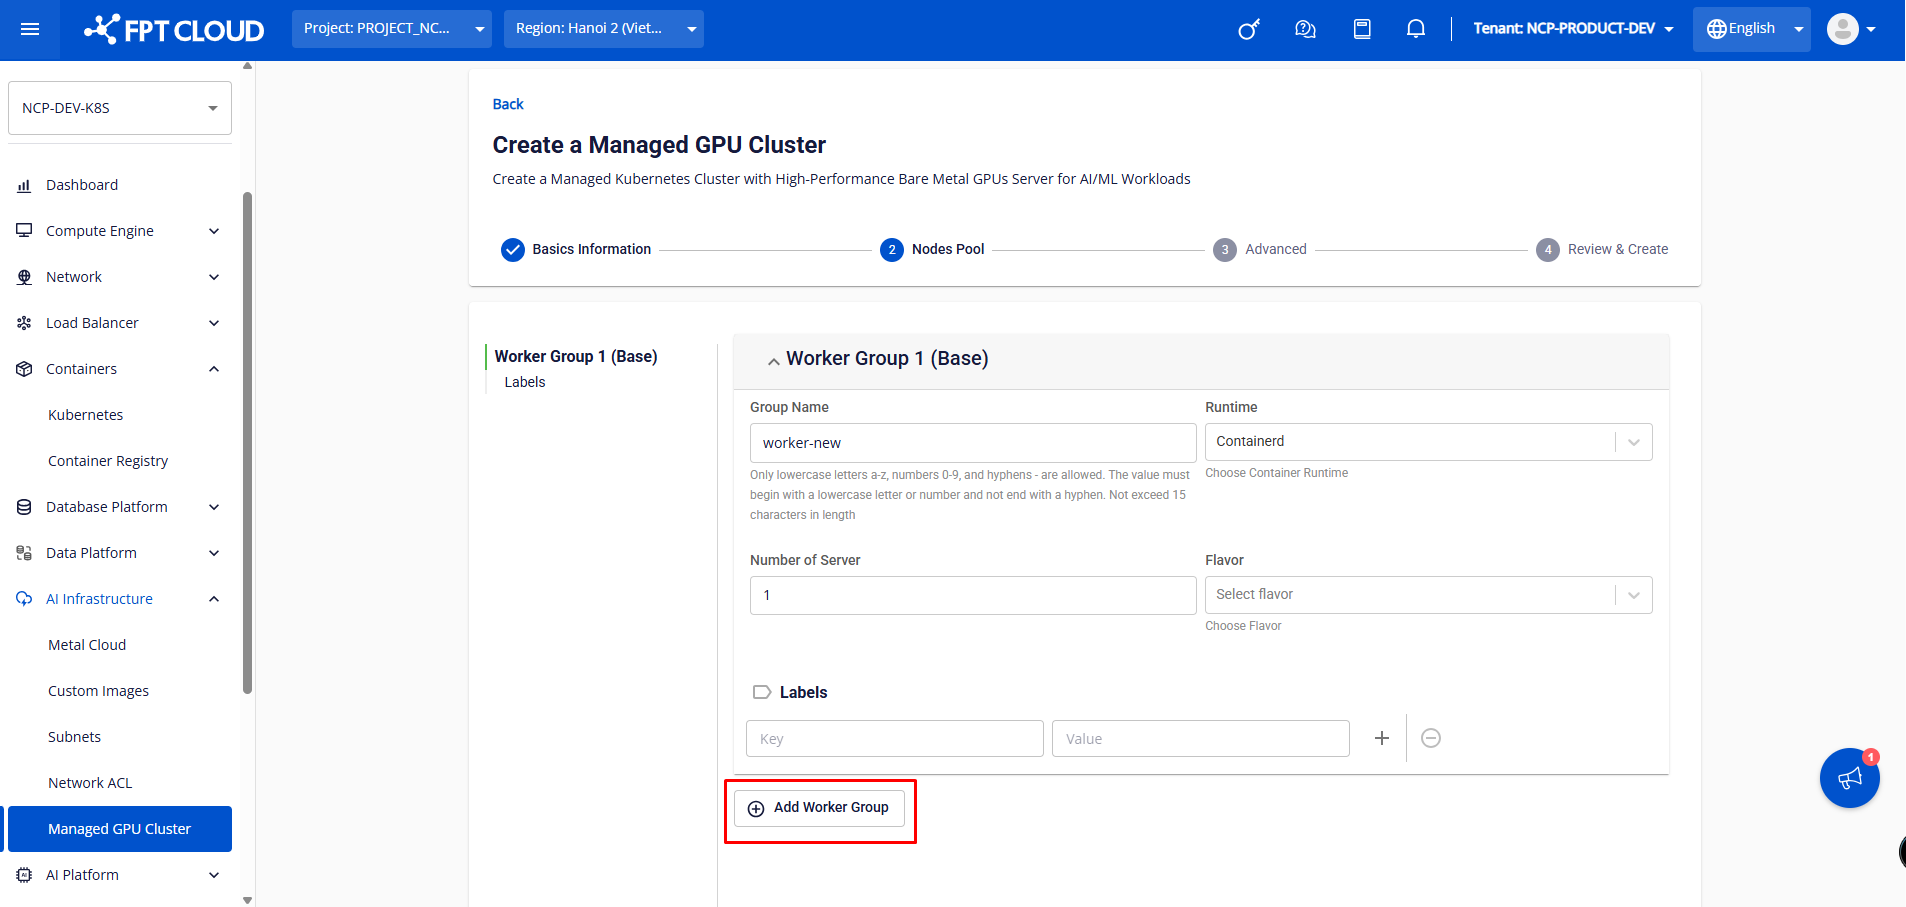
You can add a worker group by clicking the [Add Worker Group] button when initializing the k8s cluster.
Additionally, from worker group 2 onward, you can configure taints for the worker group for the purpose of scheduling applications on worker nodes. Taints can also be easily added, removed, and edited.
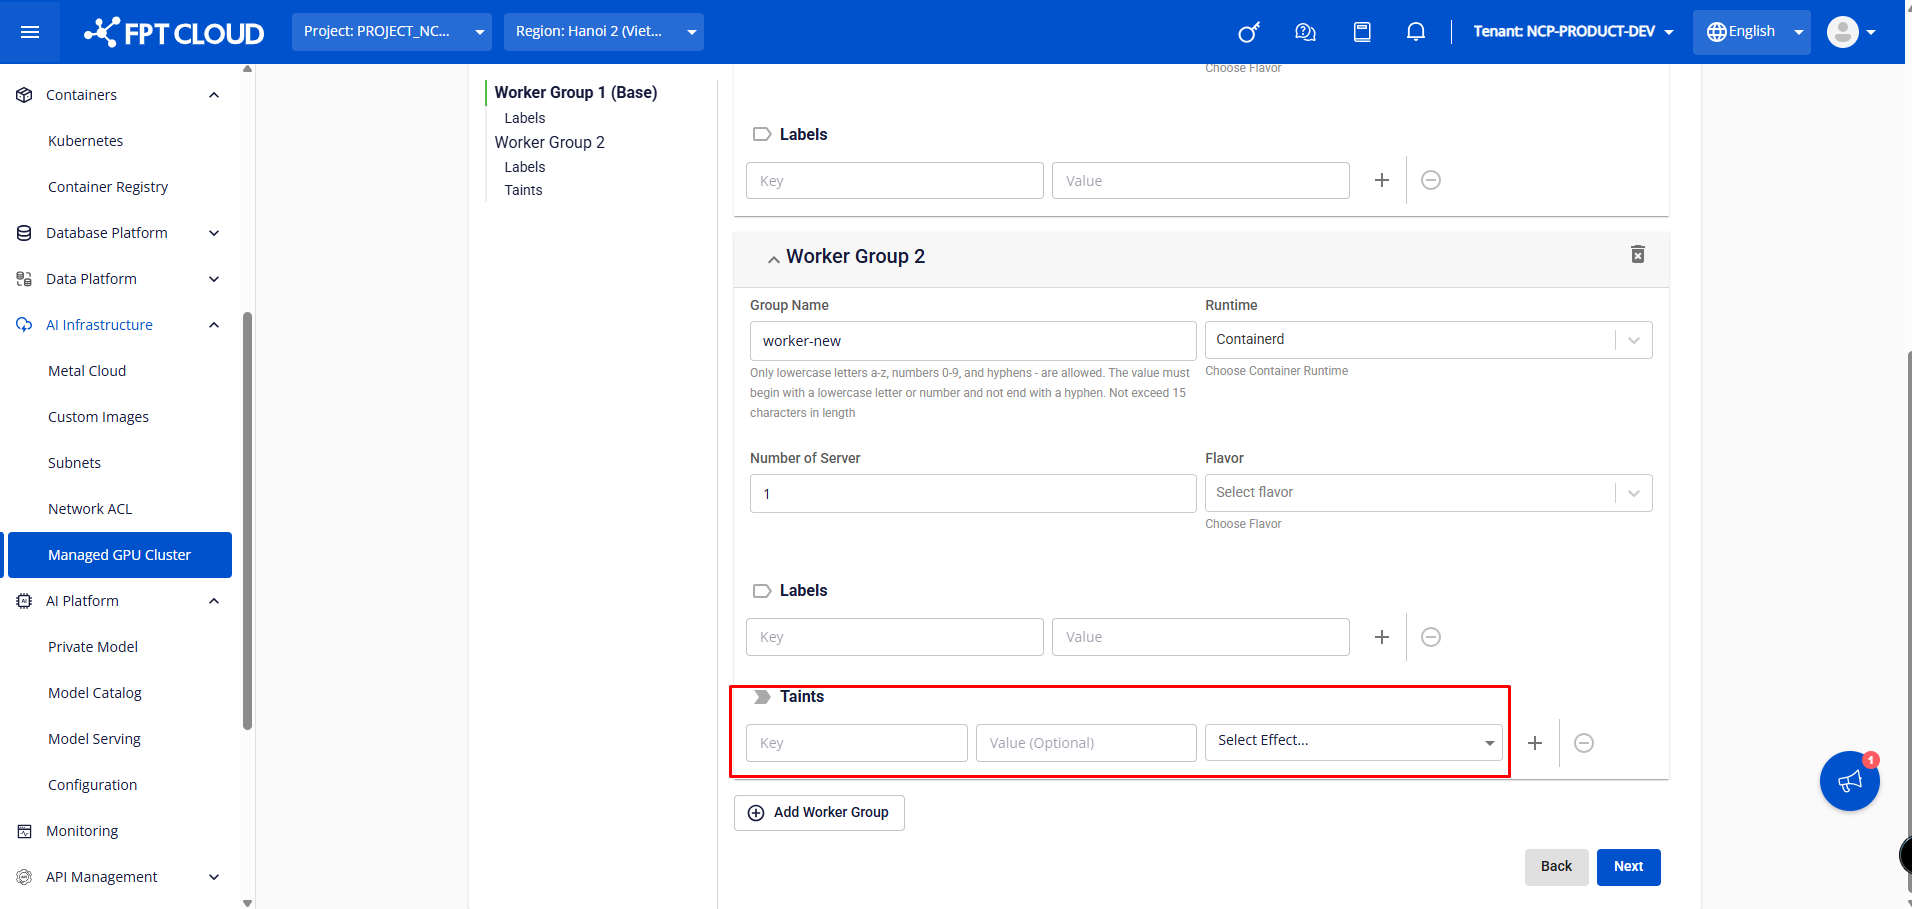
Note: Users who configure labels/taints for a worker group on the Unify Portal cannot delete the labels/taints of nodes in that worker group using kubectl (the system automatically re-adds the labels/taints according to the Unify Portal settings). You must therefore delete the label/taint configuration on the Unify Portal.
Step 4: [Advanced Settings]
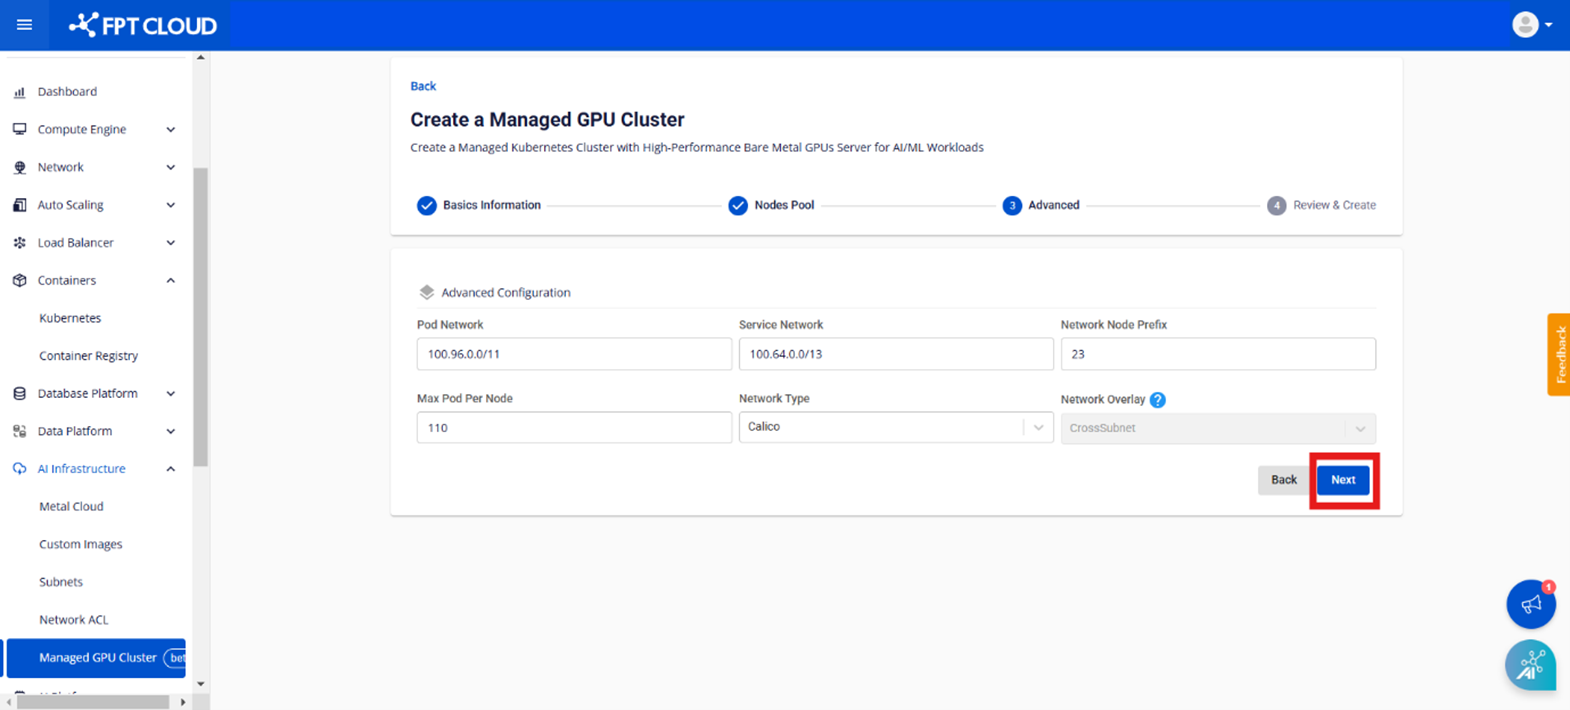
- Pod Network: The network used for pods in the cluster.
- Service Network: The network used for the cluster's services.
- Network Node Prefix: The maximum number of pods per Managed GPU node.
- Max Pod per Node: The CNI type configured for the cluster; only Calico type is supported.
Step 5: The Review & Create screen displays the user cluster information configured previously, and the system automatically checks whether there is sufficient Bare Metal GPU server quota to initialize the cluster.
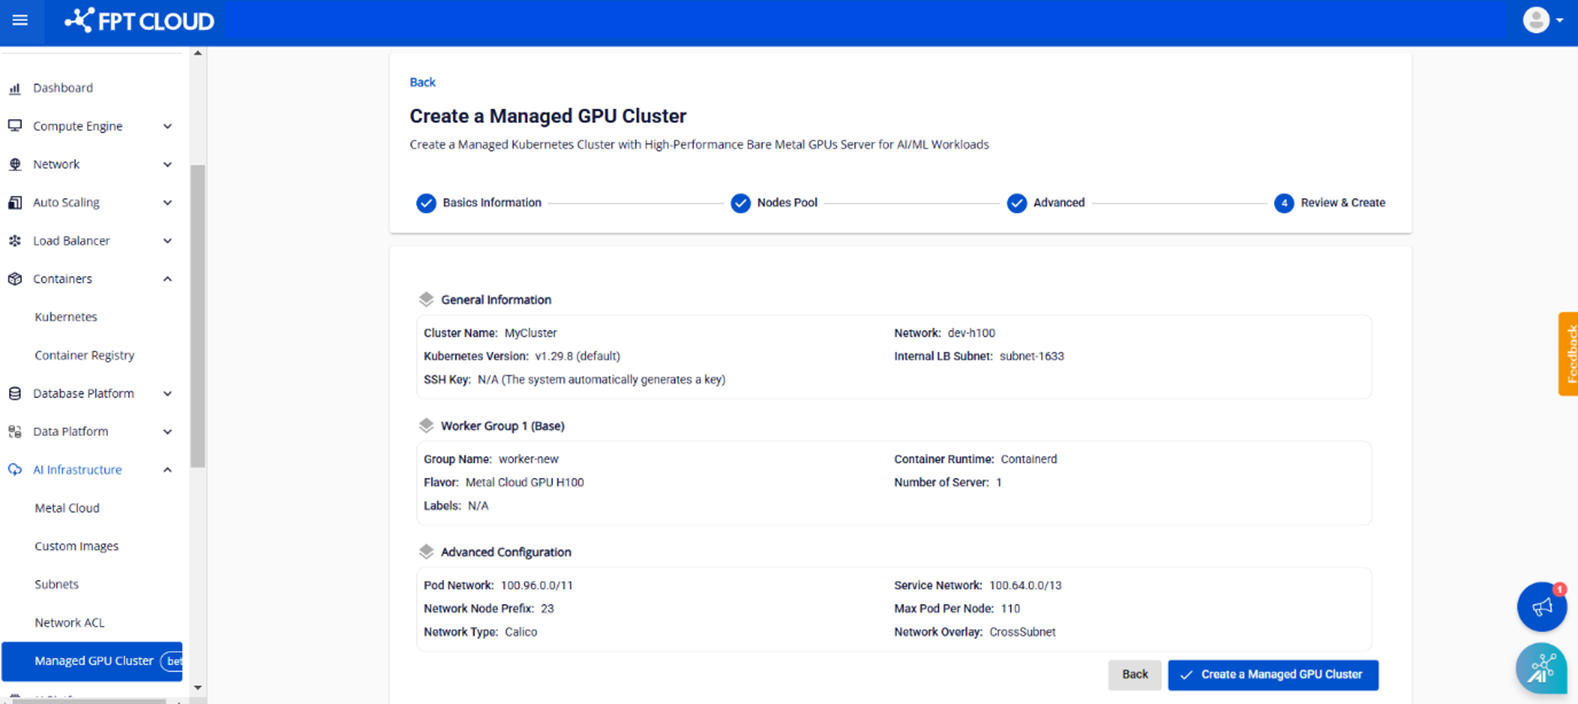
Once the system has successfully checked the resources, click the [Create Managed GPU Cluster] button to proceed with creating the cluster.